
Manage Translations Using the Multi-Language Panel
Description
The Multi Language panel in the Designer contains tools that allow you to manage translations for your Multi-Language System (MLS) applications. It allows you to search, update, and apply translations in the current view, the project, or across your Designer workspace. This panel also provides tools that allow you to search for, modify, merge, delete, import, and export translations.
Managing Translations
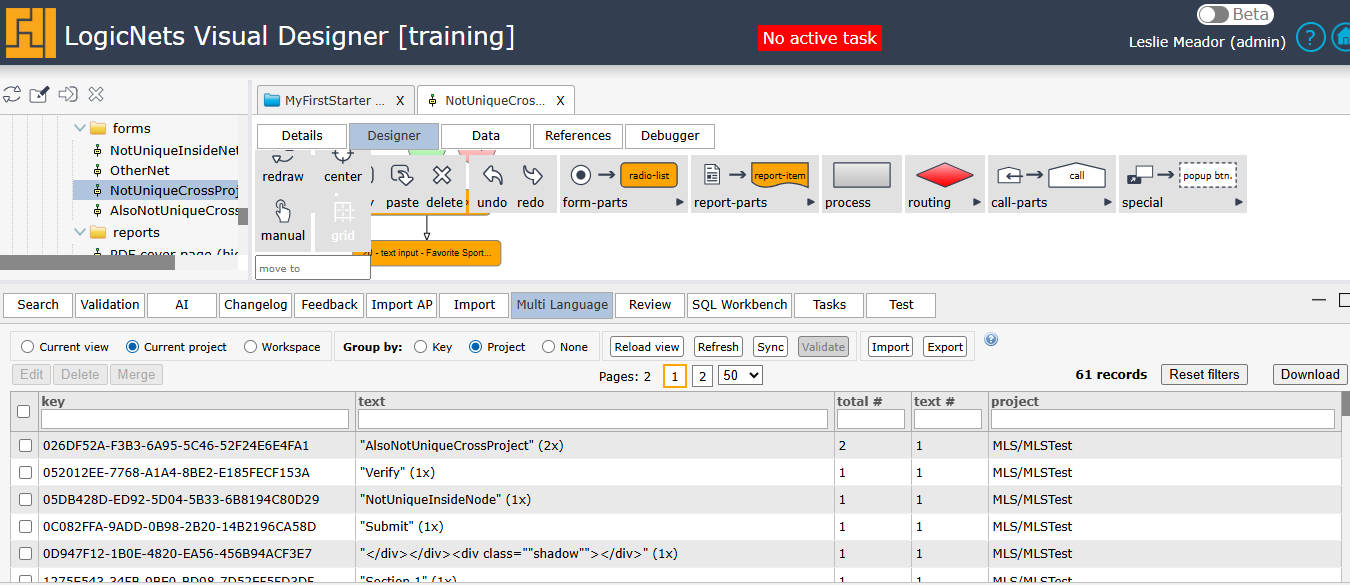
The Multi Language panel displays the MLS translation keys and their corresponding text for your logicnets as well as the locations where the key is used. If the same key is used in multiple locations, the system displays each location of that key in rows of the same color. The system changes the row color for the next different key in the list. This should help you recognize when keys are the same.
Find a Translation
When you double-click on a row the Designer navigates to the key's location.
- Use the key column to filter on a specific key or partial key.
- Use the text column to filter for specific text. The system displays HTML text in raw syntax, meaning the system displays and allows searching on styling and formatting tags. The ‘used by’ column shows in short format the location in which the key is used. The format is as follows: <project>/<folder>/<folder>.../<logicnet name> | <node and field>.
- When a key still exists in the translation tables but is not used by any node, the system displays <NONE>. This provides information on unused keys you might want to remove from the system.
- To quickly clear all filtering, click the Reset filters button on the right side of the panel.
Edit a Translation
To edit the translation text, check the checkbox next to one or more rows and click the Edit button on the right side of the panel. The system opens a popup window with the selected text and allows you to edit it.

Use the checkboxes at the top of the popup to show/hide the descriptions and to display empty translations. Use the up/down triangles or click on the header to collapse/expand a key. Click Save to save your changes.
Merge Translations
If you have multiple versions of the same translations, the system allows you to merge them under one translation key, simplifying any updates and standardizing your text. To merge translations, search for the value in the text field.
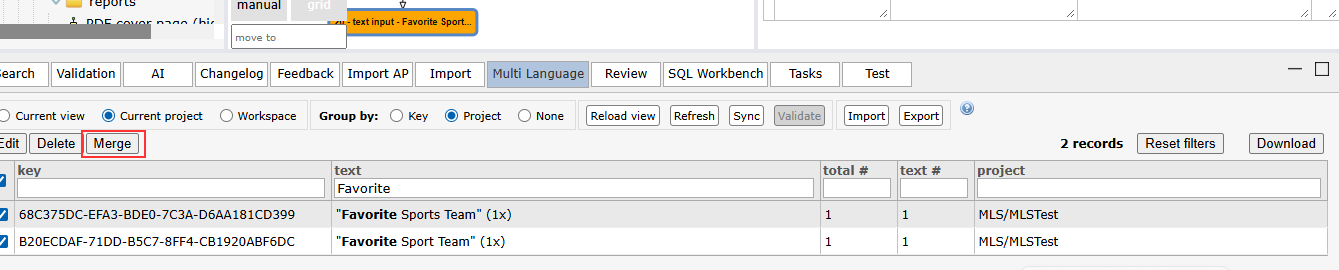
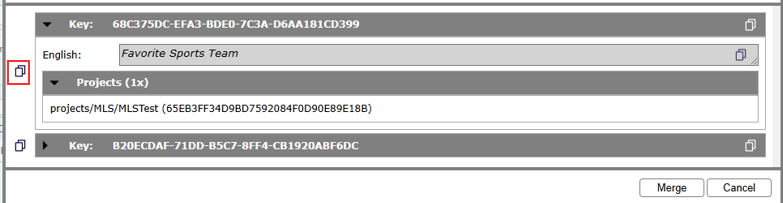
Select the rows you want to merge and click Merge. The system displays the selections and allows you to determine which translation key and translations to use.
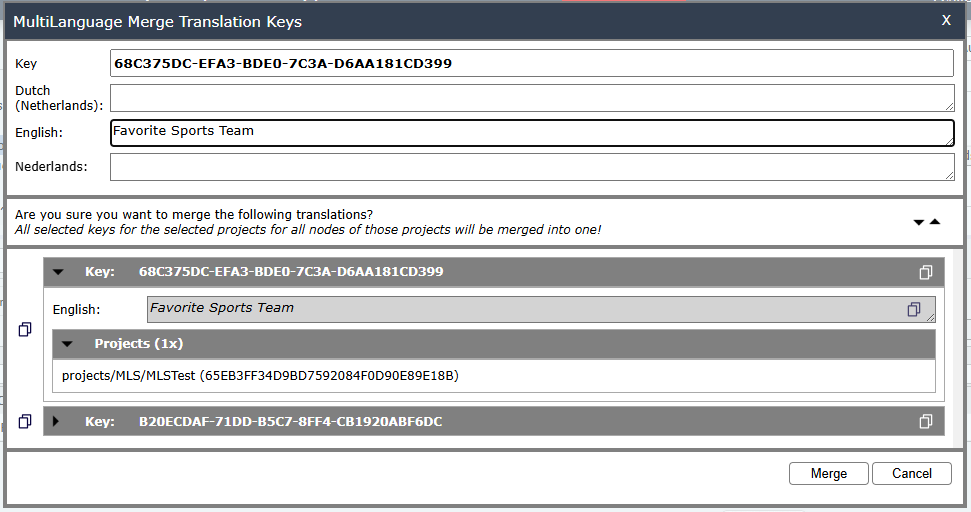
Select the key you want to use and click Merge. The system will display a warning to verify that you want to take this action.
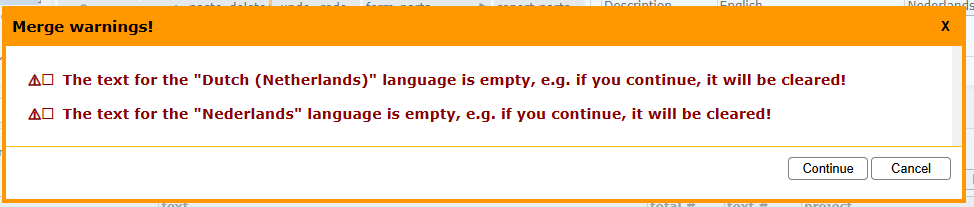
Click Continue to complete the merge.
Copy and Merge
There are different copy icons as part of the merge functionality: copy key, copy text, and copy all.
- When you click on the copy icon to the right of a translation key, the system copies that key into the 'to-be-merged-into' key.

- If you click on the copy icon on the right of a particular language translation, the system copies the text for that language.
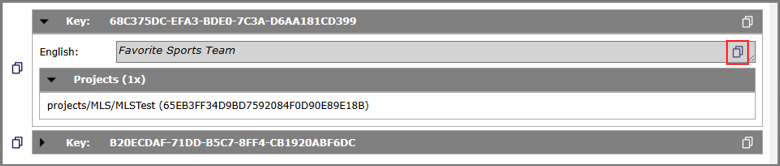
- If you click the copy icon to the left of a translation block, the system copies the entire block, including the translation key and translations
Remove Translations
To remove translation keys, check one or more rows and click the Delete button. The system will display a popup asking you to confirm the deletion.

- In this popup, the system displays the English text associated with the translation key. If you delete a translation key, the system removes the text from all locations where that key is used. Note: When the same key is used in multiple places within the same project, you do not need to check all rows for that key. The system will remove all translations linked to that key in that project. However, to delete the same key in another project you must delete the key in each project.
- To limit the number of keys displayed in the tab, you can use one of the following three methods:
- Selecting Current view displays the keys associated with the nodes you have selected in the Designer. If you select a logicnet, the system displays the translation keys in that logicnet.
- Selecting Current project displays all translation keys in the selected project.
- Selecting Workspace displays all keys from all projects in the workspace, allowing you to find duplicate text across multiple projects to increase reusability of the translation keys.
- When you change a selection in the Designer tree, the system only refreshes the panel when you click the Reload view button to update the table. This ensures the system does not change your view unexpectedly.
Refresh and Sync
- When you click the Refresh button, the system performs a quick scan of all projects in your workspace and updates the translation key indexes. This is useful when you have imported a new project, for example.
- When you click the Sync button the system starts the ‘sync’ functionality, updating all text that differs from the original and ensuring translation key consistency. If a text item does not have a translation key, the sync process creates one for it. Note: Sync only operates on the project level. You must sync each project with translation updates.
- You can also use the MLS tab Download button to store any filtered data to a comma-separated file. Note that this file format mirrors the on screen view, and you cannot re-import this file - see below,
Export and Import
The system allows you to export and import a CSV file with translation keys. This allows you to export a file with all of the existing translation keys and associated text. This would, for example, allow you to export a file of all of the English text in the application and provide it to translators to create the associated translations. You would then be able to import the updated translations into your application. See below for important note on export format.
Export
To export a translation file for your project, go to the Multi Language panel and click Current project.

- Click Export. The system syncs the translations to make sure you are exporting the current translation keys.
- From the popup, choose all the languages you want to export.
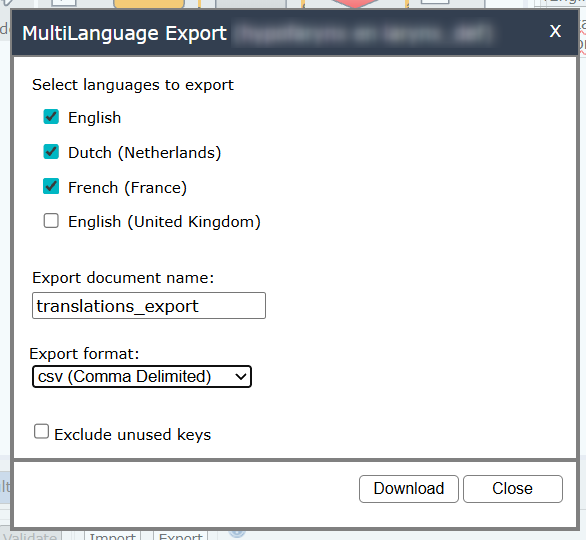
- IMPORTANT Note on Export Formats:
- Choose the appropriate export format for your region: comma delimited or semi-colon delimited.
When importing into spreadsheet software such as Microsoft Excel, the expected CSV delimiter depends on the operating system’s locale settings.
Use comma-delimited CSV in North America, UK, and other dot-decimal locales, including Australia and much of Asia.
Use semicolon-delimited CSV in comma-decimal locales, including most of continental Europe and parts of South America.
- Click the Exclude unused keys checkbox to prevent the system from exporting keys that are not used in the project.
- Click the popup Download button to start the export and save the generated CSV file in your default download location or your desired location.
Import
You can import comma-separated CSV files back into your project; for example, once you have entered translations into the originally exported file of translation keys. Click Current project and click the Import button from the Multi Language panel.

Click Choose File to select a file to import and then click Upload. If the system detects a conflict or that the text in the project was updated after the text in the CSV file, it displays an error message like the following:

You can decide for each conflict which text the system should use: the one in the project/Designer or the one from the imported file. Once the import process completes, the system displays an import summary:

If there are no conflicts, the system displays the following message:

You cannot undo an import after it is complete and importing triggers the system to perform a sync of the translation keys. Note: Importing only applies to the current selected project.
- Click the Select button to individually choose which text to use. When you are finished, click the Individual button.
- To use all data from the import file, click the Overwrite button. To keep the original text of the conflicted key, click the Keep button.
- Clicking the Cancel button stops the import and retains the original translations.
- To export all translations in a project, click the Export button.
- Choose all the languages you want to export.
- Click the Exclude unused keys checkbox to prevent the system from exporting keys that are not used in the project.
- Click the Download button to start the export and save the generated CSV file in your default download location or your desired location.
Tips & Tricks for Export/Import
The exported file will conform to the CSV format selected, and can be opened directly in Excel. If there are flaws in the export that break lines , there are two workarounds:
- Open Excel first and select File Import to trigger the Excel Text Import Wizard, where you can customize the text import options and preview the parser results.
- Open the file first in a text editor, like Notepad ++, and remove or replace unwanted characters.
Reply
Content aside
- 5 yrs agoLast active
- 57Views
-
4
Following