
Import/Export an Example Project
The LogicNets Designer allows you to easily import and export packages from one Designer workspace to another. This allows users to share packages, making them available to others for use or modification. To view the example projects available on this forum, you will need to know how to import them into your Designer account. To send a copy of your modeled content to LogicNets for support purposes you will use the export feature. Both of these actions are described below.
Import into the Designer
Once you have created an exported zip file or you have been given an exported zip file, you can import that file into another Designer location.
- Go to the Designer location where you want to import the file.
- In the Projects pane click the New Project icon.

- The system displays the new project screen where you can select from various project templates. It also shows you the Import tab. Click on this tab.

- Click Choose File to pick the zip file you want to import.
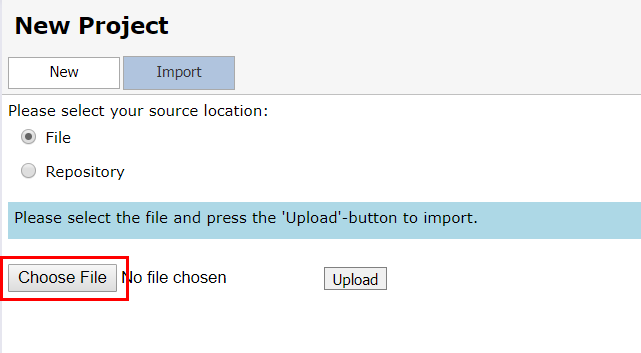
- Select the zip file you want to import. Click Upload once you have selected a zip file to upload.

- The system imports your project and it is visible in the Projects pane.
You can publish the package from the Designer into which you imported the file.
Export from the Designer
To export a project from your Designer, log into your Designer and follow these steps:
- In the Projects pane click on the name of the project you want to export.
- In the Viewer pane make sure you are on the Details tab and click Export.

The system creates a zip file and puts it in the file on your computer you have designated for downloads. You can now share that zip file with others.
Reply
Content aside
- 4 yrs agoLast active
- 58Views
-
3
Following