Add a Node

Introduction
There are several ways to add a node to a logicnet. This topic walks you through the ways to do this.
Click to Add Node
To add a new node from the toolbox click the node type you want to add. For each category of node, the system shows the last-selected node type as a clickable icon. You can also click on the expander and select from the list. The system adds the node to the Viewer, but does not attach it to your logicnet.
Add a Node into the Logicnet Flow
If you select an existing node from the logicnet, the system outlines it in blue and displays the label in bold type. If you then click on a node icon in the toolbox, the system adds the node type you selected into the logicnet. It places it right after the node you clicked on first.
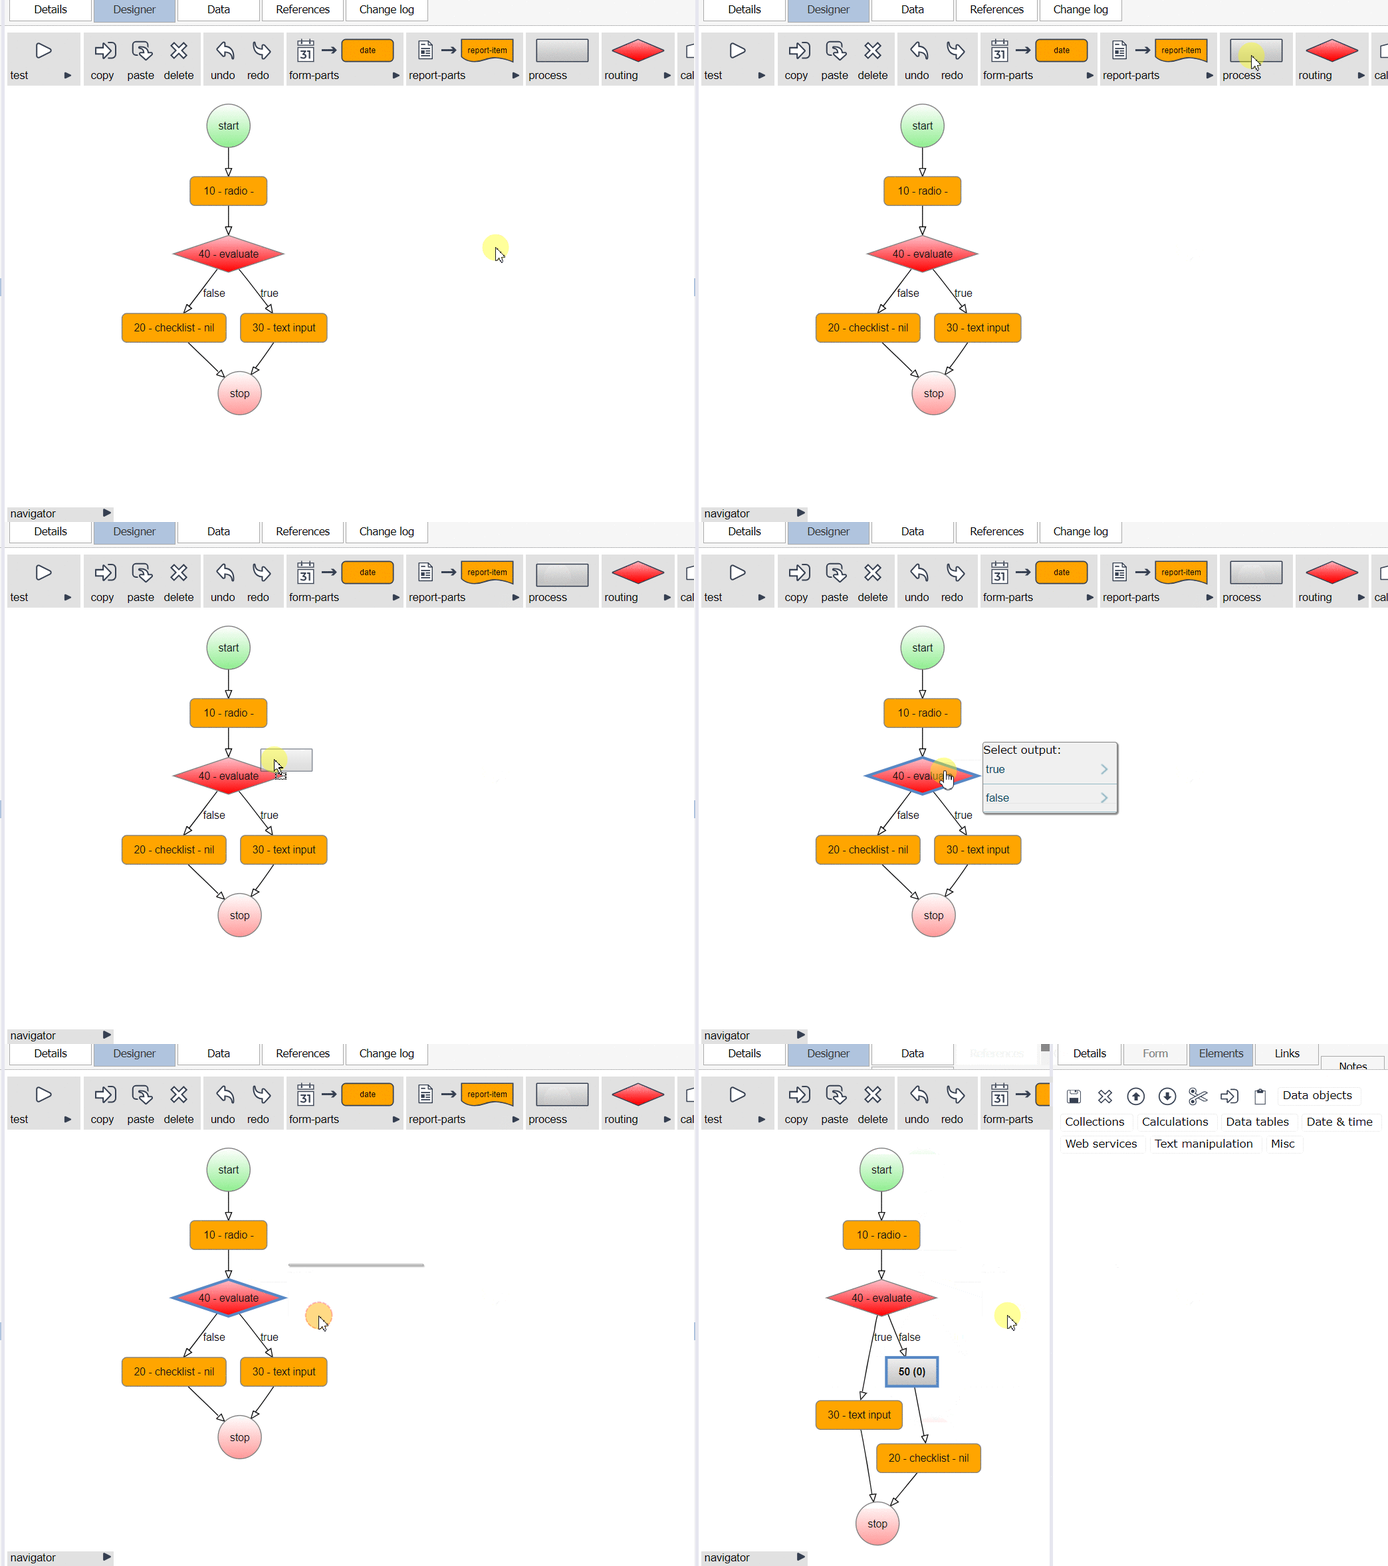
Note: When the system adds the node it automatically opens the editor for that node type on the right side of the screen.
Add a Node Using Drag and Drop
The Designer contains drag-and-drop functionality for nodes and you can add a node by dragging it from the Nodes Toolbox onto your Viewer. Locate the node type you want from the Toolbox, click and hold on it, and drag it onto an open spot on your Viewer. If you drop your node on the start node the system will make the dragged node the first node in your logicnet. The system connects the nodes together and opens the editor for your dragged node.

If you drag and drop your new node onto an existing node that has more than one output options, the system will display the output options for you to make a choice. Select an output option from the list and the system will add the new node to that output. If you press the Esc key on your keyboard instead of selecting an output option, the system will not add the new node.

Adding a Rule
When you insert a rule into a pathway in v7.4+, the system connects the TRUE and FALSE to the next node by default. To complete the logic step you should do one of the following:
Drag and drop one of the outputs to an alternative node.
Drag and drop one of the outputs to the STOP node (shown below).
Right click to delete the output. This creates a "dead end" that behaves the same as the STOP node during runtime.

Reply
Content aside
- 4 yrs agoLast active
- 90Views
-
2
Following
